You have no items in your shopping cart.

Recent Posts
-
Store Walking Canes Upright When Not In Use
-
Why an Elegant Cane Is a Thoughtful Gift for Loved Ones?
-
The Art of Christmas Design: Walking Canes That Celebrate the Season in Style
-
How an Ergonomic Walking Cane Handle Prevents Hand and Wrist Strain?
-
How to Walk With a Cane Correctly to Avoid Back or Shoulder Strain?
-
5 Common Mistakes People Make When Buying a Walking Cane (and How to Avoid Them)
MOST POPULAR NOW


05
Apr
Walking sticks have been around for centuries and have become increasingly popular in recent years. Whether you are going on a hike, exploring nature, or just taking a stroll around the block, a walking stick can provide stability, support, and added balance. While you can purchase a walking stick, making your own is a great option that allows you to create a customized stick that is perfect for your needs. In this article, we will discuss the benefits of making your own walking stick, the materials needed, and an overview of the process.
How to make your own walking stick? A step by step guide
Benefits of making your own walking stick
There are numerous benefits to making your own walking stick. Firstly, it allows you to create a customized stick that is tailored to your height, weight, and preferred style. Secondly, making your own walking stick is a great way to connect with nature and the outdoors. Lastly, creating your own walking stick can be a fun and rewarding experience that provides a sense of accomplishment and pride.

Materials needed
Before you start making your own walking stick, it's essential to have all the necessary materials. Here's a list of materials you'll need to make your own walking stick:
- A straight, sturdy piece of wood
- Sandpaper
- Saw
- Wood carving tools
- Finish (optional)
Overview of the Process
The process of making your own walking stick can be broken down into several steps:
-
Find the right wood: The first step is to find a suitable piece of wood for your walking stick. The wood should be straight, sturdy, and free of any cracks or knots. Common types of wood used for walking sticks include hickory, ash, oak, and birch.
-
Cut the wood: Once you have found the right wood, the next step is to cut it to the appropriate length. Your walking stick should be tall enough to reach your armpit when standing straight with your arm at your side.
-
Sand the wood: After cutting the wood to the appropriate length, sand the wood with sandpaper to smooth out any rough edges or bumps.
-
Carve the wood: Now it's time to start carving your walking stick. Use wood carving tools to add texture, designs, or patterns to the stick.
-
Finish the wood: Lastly, you can choose to finish the wood with a coat of varnish or paint to protect the wood and add a polished look.
Safety precautions
While making your own walking stick can be a fun and rewarding experience, it's important to take the necessary safety precautions. Always wear protective gear such as gloves and eye protection when carving wood. Additionally, make sure to use sharp tools and keep them away from children and pets.
Making your own walking stick is a fun and rewarding experience that allows you to create a customized walking stick that is perfect for your needs. Whether you're going on a hike, exploring nature, or just taking a stroll around the block, a walking stick can provide stability, support, and added balance. With the right materials and safety precautions, making your own walking stick is a great way to connect with nature and the outdoors.
Choosing the right wood
One of the most important considerations when making your own walking stick is selecting the right type of wood. The wood you choose will have a significant impact on the appearance, durability, and overall quality of your walking stick. In this article, we will discuss the characteristics of good walking stick wood, popular wood types and their benefits, and factors to consider when selecting wood.
Characteristics of good walking stick wood
The ideal wood for a walking stick should have several key characteristics. Firstly, it should be strong and durable enough to support your weight and withstand the stresses of regular use. Secondly, it should be lightweight and comfortable to hold, with a smooth and polished surface that won't irritate your hands. Lastly, the wood should be straight and free of knots or cracks, as these can weaken the structure of your walking stick.
Popular wood types and their benefits
There are numerous types of wood that are popular for making walking sticks, each with its own unique benefits and characteristics. Here are a few of the most common types of walking stick wood:
-
Hickory: Hickory is a popular choice for walking sticks due to its strength, durability, and flexibility. It is also lightweight and has a distinctive grain pattern that adds to its aesthetic appeal.
-
Ash: Ash is another strong and durable wood that is commonly used for walking sticks. It has a smooth surface and is easy to carve, making it a popular choice for those who want to add custom designs or patterns to their walking stick.
-
Oak: Oak is a dense and heavy wood that is highly resistant to wear and tear. It has a distinctive grain pattern and can be polished to a smooth and shiny finish.
-
Birch: Birch is a lightweight and flexible wood that is easy to carve and comfortable to hold. It has a pale color and a subtle grain pattern that gives it a simple and elegant look.

Factors to consider when selecting wood
When choosing the right wood for your walking stick, there are several factors to consider. Firstly, you should consider your own personal preferences and the specific purpose of your walking stick. If you plan to use it for hiking or outdoor activities, you may want to choose a stronger and more durable wood like hickory or oak. If you plan to use your walking stick for casual strolls or as a decorative item, a lighter and more flexible wood like birch may be a better choice.
You should also consider the availability and cost of different types of wood. Some types of wood may be more expensive or difficult to find than others, so you may need to consider alternative options if your preferred wood is not readily available.
Selecting the right type of wood is an important step in making your own walking stick. By considering the characteristics of good walking stick wood, popular wood types and their benefits, and factors to consider when selecting wood, you can make an informed decision that will result in a high-quality and durable walking stick that is perfect for your needs.
If you're interested in making your own walking stick, we recommend starting with a simple design and experimenting with different types of wood to find the one that works best for you. With a little practice and patience, you can create a beautiful and functional walking stick that will last for years to come.
Preparing the wood
After choosing the right wood for your walking stick, it's time to prepare the wood before shaping it. Preparing the wood is a crucial step in creating a durable and functional walking stick. Here are some essential steps in preparing the wood:
Tools and equipment needed
To prepare the wood, you'll need some tools and equipment. These include a saw, carving knife, sandpaper, a rasp, a straightedge, and a vise or clamps to secure the wood. A drawknife, gouges, and spokeshave are also handy tools to have for shaping the wood.
Harvesting and seasoning the wood
If you've chosen green or fresh wood, it's best to let it dry or season for several months before using it. This process ensures that the wood is stable and won't warp or crack over time. To season the wood, first, cut it to the desired length and remove any branches. Then, strip the bark off and let the wood dry in a cool, dry place for several months. This process allows the wood to lose moisture and become more stable.
Sanding and smoothing the wood
After the wood has been seasoned, it's time to sand and smooth it. Start by using a rasp to remove any rough spots and uneven areas. Then, use sandpaper to sand the wood, starting with a coarse grit and working your way up to a fine grit. This process will help to remove any remaining rough spots and prepare the wood for shaping.
Once you've sanded the wood, you can apply a finish to protect it and enhance its appearance. Applying a finish will help to seal the wood and protect it from moisture and other elements that could cause it to deteriorate over time.
In conclusion, preparing the wood is an important step in creating a functional and durable walking stick. By following these steps and using the right tools and equipment, you can ensure that your walking stick will be both beautiful and functional for years to come.
Designing your walking stick
Once you've prepared the wood for your walking stick, it's time to start thinking about the design. The design of your walking stick will depend on your personal preferences, as well as the intended use of the stick. Here are some tips for designing your walking stick:
Choosing the perfect length
The length of your walking stick is important for both comfort and functionality. To determine the ideal length for your stick, stand up straight with your arms at your sides. Measure the distance from the ground to your wrist. This measurement will give you a good idea of the length of your stick.
Deciding on the shape and style
The shape and style of your walking stick are also important. You can choose from a wide range of styles, from traditional to modern. Some popular styles include rustic, carved, and polished. The shape of your stick will depend on your personal preferences and intended use. A straight stick is ideal for general use, while a curved stick may be more comfortable for those with wrist or hand problems.
Personalizing your stick with carvings and embellishments
Once you've decided on the shape and style of your walking stick, you can personalize it with carvings and embellishments. Carvings can be simple or intricate and can include anything from initials to elaborate designs. Embellishments can include leather wraps, brass fittings, or other decorative elements.
When designing your walking stick, it's important to keep in mind the intended use of the stick. If you plan on using the stick for hiking or other outdoor activities, it may be best to keep the design simple and functional. If you plan on using the stick for decorative purposes, you may want to add more elaborate designs and embellishments.
In conclusion, designing your walking stick is a fun and creative process that allows you to personalize your stick to your own unique style and needs. By following these tips, you can create a walking stick that is both functional and beautiful.
Carving and shaping the stick
Carving and shaping your walking stick is an important part of the process, as it can add a personal touch and make the stick more comfortable to use. Here are some tips for carving and shaping your stick:
Selecting the right carving tools
To carve your walking stick, you will need a few basic tools. The most important tool is a carving knife. A good carving knife should have a sharp blade and a comfortable handle. You may also want to invest in a set of carving chisels and gouges, which can help you create more intricate designs.
Basic carving techniques
When carving your walking stick, it's important to start with the basics. Begin by making small cuts with your carving knife to remove any rough spots or bumps on the stick. You can then use your carving chisels and gouges to create more intricate designs and patterns.
One basic technique for carving your walking stick is to use a v-gouge to create decorative lines or borders. Another technique is to use a U-gouge to create a channel or groove in the wood.
Creating intricate designs and patterns
Once you've mastered the basic carving techniques, you can start creating more intricate designs and patterns on your walking stick. This can include anything from simple initials to elaborate scenes or figures.
One way to create intricate designs is to use a wood-burning tool to create patterns or designs in the wood. Another option is to use a carving knife to create 3D shapes or figures, such as animals or plants.
When carving your walking stick, it's important to take your time and be patient. Carving can be a time-consuming process, but the end result can be well worth the effort.
In conclusion, carving and shaping your walking stick is a fun and creative process that allows you to add a personal touch to your stick. By selecting the right carving tools and using basic carving techniques, you can create a walking stick that is both beautiful and functional.
Adding accessories
Once you have carved and shaped your walking stick, you may want to add some accessories to make it more comfortable to use. Here are some tips for adding accessories to your walking stick:
Adding grips and handles
Adding a grip or handle to your walking stick can make it more comfortable to hold, especially on long walks. Grips and handles can be made from a variety of materials, including leather, rubber, and cork.
To add a grip or handle to your walking stick, begin by measuring the circumference of the stick where you want the grip to be. You can then select a grip or handle that fits snugly around the stick. To attach the grip or handle, use a strong adhesive or wrap it tightly with twine or cord.
Installing wrist straps
Adding a wrist strap to your walking stick can help prevent you from dropping it while walking. Wrist straps can be made from leather, nylon, or other strong materials.
To install a wrist strap, begin by drilling a small hole in the end of your walking stick. You can then thread a piece of cord or strap through the hole and tie it securely in place. Make sure the wrist strap is snug but not too tight, as you still want to be able to move your hand freely.
Attaching rubber tips
Attaching rubber tips to the bottom of your walking stick can help prevent it from slipping on smooth surfaces and can also help protect the tip of the stick from wear and tear. Rubber tips are available in a variety of sizes and can be easily installed by slipping them onto the end of the stick.
When attaching rubber tips, make sure to select a size that fits snugly over the tip of your walking stick. You may need to trim the tip of the stick slightly to ensure a tight fit. Once the rubber tip is in place, test it on a variety of surfaces to ensure that it provides good traction.
In conclusion, adding accessories to your walking stick can make it more comfortable and functional to use. Whether you're adding a grip or handle, a wrist strap, or rubber tips, be sure to select high-quality materials and take your time to install them properly. With a little care and attention, your walking stick can be a reliable and stylish companion on all your outdoor adventures.
Staining and finishing
Staining and finishing your walking stick is an important step to protect the wood and give it a beautiful appearance. Here are some tips to help you choose the right stain or finish and apply it correctly.
Choosing the right stain or finish: When selecting a stain or finish for your walking stick, it's important to consider the type of wood you are using, as well as your personal preferences. Some popular stain options include oil-based stains, water-based stains, and gel stains. Each type of stain has its own unique characteristics, such as the color and depth of the finish.
Another option for finishing your walking stick is to use a clear coat. This type of finish will not change the color of the wood, but will protect it from scratches and other types of damage. Some popular clear coat options include polyurethane, lacquer, and varnish.
Applying the stain or finish: Before you start staining or finishing your walking stick, make sure it is clean and free of any dirt or debris. Apply the stain or finish in a well-ventilated area and wear gloves and protective clothing to avoid getting the product on your skin.
When applying the stain, use a brush or cloth to evenly distribute the product over the entire surface of the stick. Be sure to follow the manufacturer's instructions for the recommended drying time before applying a second coat. If you are using a clear coat, apply it in the same manner, making sure to coat the entire surface of the stick.
Curing and drying the stick: After you have applied the stain or finish, allow the walking stick to cure and dry completely. This process may take several hours or even several days, depending on the type of stain or finish you are using. Once the stick is dry, you can add any final touches or accessories.
In conclusion, staining and finishing your walking stick is an important step to protect the wood and enhance its appearance. Take the time to choose the right stain or finish, apply it correctly, and allow it to cure and dry completely. With proper care, your walking stick will last for many years to come.
Maintaining your walking stick
Congratulations on making your own walking stick! You've put in a lot of hard work and creativity to make a truly unique and functional accessory. Now that your walking stick is complete, it's important to take proper care of it so that it lasts for years to come. Here are some tips for maintaining your walking stick:
Cleaning and polishing the stick
To keep your walking stick looking great, it's important to clean it regularly. Use a soft cloth to wipe down the surface of the stick, removing any dirt, dust, or debris that may have accumulated. If the stick is particularly dirty, you can use a mild soap and water to clean it, but be sure to dry it thoroughly afterwards.
If you want to add some shine to your walking stick, you can also polish it using a furniture wax or a similar product. Apply a small amount of the wax to the surface of the stick and use a soft cloth to buff it in. This will help to protect the wood and give it a nice luster.
Storing the stick properly
When you're not using your walking stick, it's important to store it properly to prevent damage. Avoid storing it in areas that are too hot, too cold, or too humid, as these conditions can cause the wood to warp or crack. Instead, find a cool, dry place to store your stick, such as a closet or a storage room.
If you're traveling with your walking stick, be sure to pack it carefully to prevent any damage during transit. You can wrap it in a soft cloth or a towel, or use a padded carrying case to protect it.
Repairing any damage or wear and tear
Over time, your walking stick may experience some wear and tear, or even sustain some damage. If this happens, don't worry - many issues can be easily repaired.
For example, if your walking stick develops a crack or a split, you can often repair it using wood glue. Apply the glue to the affected area and clamp it together until it dries. If your stick becomes scratched or dented, you can sand it down and refinish it to restore its appearance.
If you're not comfortable making repairs yourself, you can also take your walking stick to a professional woodworker or repair shop for assistance.
By following these tips, you can help to ensure that your walking stick remains in great condition for years to come. Whether you're using it for hiking, walking, or just as a stylish accessory, your walking stick is sure to be a valuable and cherished possession.
Conclusion
Walking sticks have been a useful tool for centuries, not only for support during walks but also as an aid in hiking and trekking. In addition, a walking stick can also be a beautiful accessory that can express one's personality and style. If you're looking for a new hobby or a way to personalize your walking aid, making your own walking stick may be the perfect solution. In this article, we've covered the steps and materials needed to make your own walking stick, including choosing the right wood, preparing the wood, designing and carving the stick, adding accessories, staining and finishing, and maintaining the stick.
Choosing the right wood is crucial for creating a walking stick that is both sturdy and attractive. Hardwoods such as oak, hickory, and maple are ideal choices, as they are strong and durable. However, other woods such as cedar or pine can also be used for walking sticks, especially if you prefer a lighter weight. When selecting the wood, it's important to consider its characteristics, such as its strength, flexibility, and grain patterns.
Once you've selected the right wood, the next step is preparing it for carving and shaping. Tools such as a saw, carving knife, and sandpaper are essential in creating the desired shape and smoothness of the stick. It's also important to let the wood season properly to prevent warping or cracking.
Designing your walking stick is where you can let your creativity shine. The length of your stick should be based on your height and walking style, and the shape and style can be customized to your liking. Personalizing the stick with carvings, embellishments, and accessories such as grips and wrist straps can add a unique touch.
Carving and shaping the stick can be a rewarding process, but it's important to have the right tools and techniques to ensure a safe and effective outcome. Basic carving techniques such as whittling and gouging can create simple designs, while more intricate patterns can be achieved with chisels and specialized carving tools.
Adding accessories such as grips, wrist straps, and rubber tips can provide added comfort and functionality to your walking stick. Grips can be made from a variety of materials such as leather or rubber, and wrist straps can be easily installed with basic hardware. Rubber tips can also be attached to the bottom of the stick to provide better traction and stability.
Finally, staining and finishing your walking stick can protect it from wear and tear and provide a polished look. Choosing the right stain or finish is important in achieving the desired color and texture, and proper application and curing time is necessary for a smooth finish.
Maintaining your walking stick is important in keeping it in good condition for years to come. Regular cleaning and polishing can prevent dirt and grime buildup, and storing the stick properly can prevent warping or damage. In the event of any damage or wear and tear, repairs can be made with basic woodworking tools and techniques.
In conclusion, making your own walking stick can be a fulfilling and rewarding process that provides both functional and aesthetic benefits. With the right materials, tools, and techniques, you can create a personalized walking stick that is not only a useful tool but also an expression of your unique style and personality.
We hope this article has provided helpful tips and insights on how to make your own walking stick. Whether you're a beginner or an experienced woodworker, creating a walking stick can be a fun and fulfilling activity that can enhance your outdoor experiences.
Also Purchased
-
![Floral carved walking canes and sticks]()
Beige Walking Cane for Ladies Chamomile Flower, Wooden Walking Stick
Introducing our beautiful Beige Walking Cane for Ladies with Chamomile Flower, a Wooden Walking Stick that is hand carved and handmade, making it both pretty and unique. This walking cane...$90.00$79.50 -
![Walking Stick with Skull Handle]()
Black Skull Head Walking Stick, Wedding Ceremony Designer Skull
Looking for a stylish and unique walking stick to elevate your look at your next event? Check out our Black Skull Head Walking Stick, the perfect accessory for any wedding...From $217.00 -
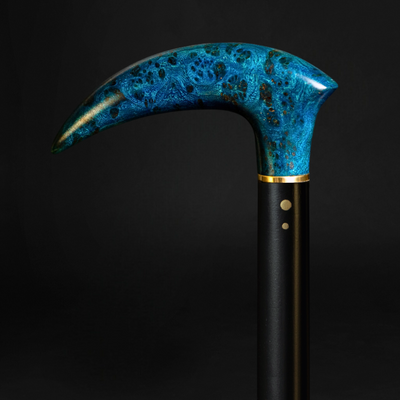
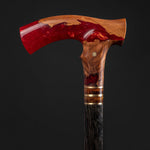
![Exotic Burl Wood Walking Cane – Fashionable Artisan Stick]()
Exotic Burl Wood Walking Cane – Fashionable Artisan Stick
A sculptural statement in deep, oceanic blue — this walking cane is more than a support accessory, it's wearable art. Meticulously hand-shaped from stabilized burl wood, the handle evokes the...$425.00 -
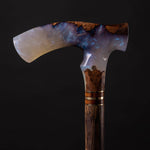
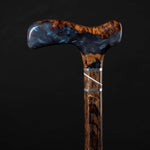
![ArtWalkingSticks™ MAGIC Walking Cane, Handmade - Make to Order]()
ArtWalkingSticks™ MAGIC Walking Cane, Handmade - Make to Order
This piece of art is created for those who value details. We make one of a kind, handcrafted wood and resin canes. Our Wooden Canes are completely unmatched in creativity....$430.00 -
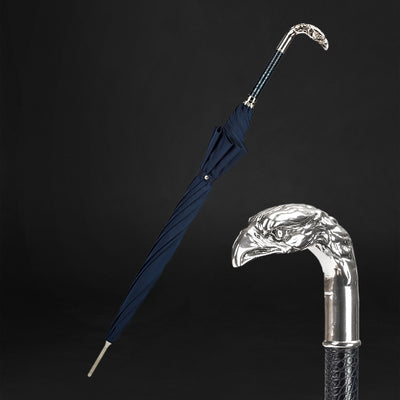
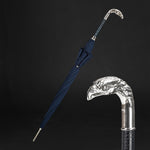
![Umbrella with Eagle Handle]()
Umbrella with Eagle Handle, Fashion Umbrella For Men
Make a bold and fashionable statement with our Umbrella with Eagle Handle - a unique and functional accessory designed for men. The striking eagle handle is the highlight of this...$325.00 -
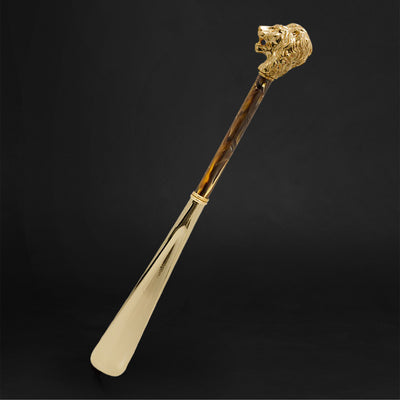
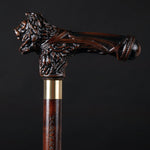
![Fashionable Lion Shoehorn Long Handle, Pearly Brown Shaft, Handmade - ART WALKING STICKS]()
Fashionable Lion Shoehorn Long Handle, Pearly Brown Shaft, Handmade
Introducing our Fashionable Lion Shoehorn, a handcrafted, long-handled shoe horn with a pearly brown shaft that's both stylish and practical. The intricate Lion design adds a touch of elegance to...$240.00