You have no items in your shopping cart.
Recent Posts
-
Why an Elegant Cane Is a Thoughtful Gift for Loved Ones?
-
The Art of Christmas Design: Walking Canes That Celebrate the Season in Style
-
How an Ergonomic Walking Cane Handle Prevents Hand and Wrist Strain?
-
How to Walk With a Cane Correctly to Avoid Back or Shoulder Strain?
-
5 Common Mistakes People Make When Buying a Walking Cane (and How to Avoid Them)
-
How to Choose a Walking Cane That Reflects Your Personality (Not Just Your Needs)?
MOST POPULAR NOW
03
Jun
In today's fast-paced world, where technology dominates our lives and everything seems to revolve around convenience and efficiency, it's easy to overlook the beauty and significance of everyday objects. One such object that often goes unnoticed is the humble walking stick. Often seen as a mere functional accessory, walking sticks have a rich history and are much more than just a support for those who need assistance with mobility. In this article, we delve into the history and significance of walking sticks as artistic expressions, shedding light on their cultural importance and the reasons why they deserve recognition beyond their utilitarian purpose.
The art of carving walking sticks: unleash your creativity
The historical significance of walking sticks:
Walking sticks have been a part of human civilization for centuries, dating back to ancient times. In various cultures around the world, they were not only used for stability but also served as symbols of power, authority, and social status. In ancient Egypt, for example, pharaohs and high-ranking officials were often depicted holding ornate walking sticks as a sign of their position in society. Similarly, in medieval Europe, walking sticks adorned with precious metals and gemstones were popular among the aristocracy as a fashion statement.
Walking sticks as artistic expressions:
Intricate craftsmanship:
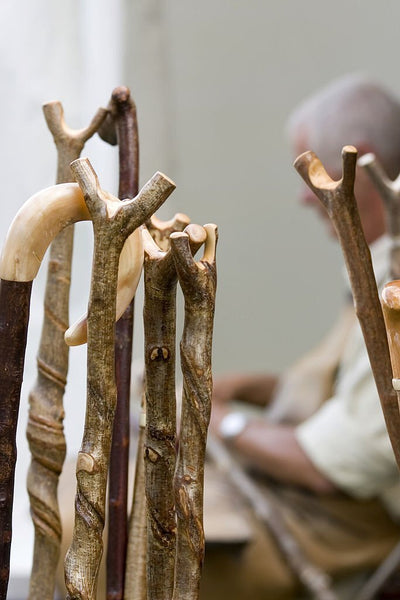
Walking sticks have long been a canvas for skilled artisans to showcase their craftsmanship. From intricate carvings and engravings to the use of exotic materials, walking sticks have been transformed into miniature works of art. Craftsmen would often spend countless hours meticulously shaping and embellishing these sticks, turning them into unique pieces that reflected the cultural and artistic influences of their time.
Cultural significance:
Walking sticks have also played a significant role in various cultural practices and rituals. In many indigenous communities, they are seen as sacred objects that connect individuals with their ancestral spirits or provide spiritual protection during important ceremonies. The designs and motifs carved into the walking sticks often carry symbolic meanings, representing cultural beliefs, myths, or historical events.
Walking sticks as fashion statements:
a) Style and elegance:
Throughout history, walking sticks have been associated with style and elegance. In the Victorian era, for instance, walking sticks became an essential accessory for men and women alike. Elaborate handles made from materials such as ivory, silver, and gold were fashioned into unique shapes, representing animals, mythical creatures, or historical figures. These intricately designed handles became a reflection of the owner's personality and fashion sense, adding a touch of sophistication to their overall appearance.
b) Customization and personalization:
One of the remarkable aspects of walking sticks is their versatility and the ability to customize them to suit individual preferences. From the choice of wood and handle design to the incorporation of personal engravings or family crests, walking sticks can be tailored to reflect the unique identity of the owner. This customization not only adds a personal touch but also allows individuals to express their individuality and make a fashion statement that is truly their own.
The modern-day resurgence of walking sticks:
While the use of walking sticks may have declined with the advancement of medical technology and mobility aids, there has been a noticeable resurgence in recent years. People are rediscovering the charm and practicality of walking sticks, not only for their intended purpose but also as unique fashion accessories. Designers and artisans are reinventing the concept of walking sticks, incorporating modern materials, innovative designs, and ergonomic features that cater to the needs and preferences of today's consumers.
Choosing the right walking stick
When it comes to carving a walking stick, selecting the right type of wood is essential to ensure the best results. Each wood variety possesses unique characteristics that can affect the carving process, durability, and overall aesthetics of the finished product. In this article, we explore the different types of wood suitable for carving walking sticks, providing valuable insights into their qualities and considerations for choosing the perfect material for your carving project.
Hardwoods for carving walking sticks:
-
Oak: Oak is a popular choice among carvers due to its strength, durability, and attractive grain patterns. It is relatively easy to carve, allowing intricate details to be achieved. Oak walking sticks have a timeless appeal and can withstand the rigors of regular use.
-
Walnut: Walnut wood offers a rich, dark brown color with a beautiful grain. It is known for its workability, making it an excellent choice for intricate carvings. Walnut walking sticks have an elegant appearance and provide a smooth finish.
-
Ash: Ash is a versatile wood that carves well and is known for its light color and distinct grain patterns. It is relatively lightweight, making it a comfortable option for those who prefer lighter walking sticks. Ash walking sticks are durable and can be finished to showcase the wood's natural beauty.
Softwoods for carving walking sticks:
-
Cedar: Cedar wood is popular for its aromatic scent, natural insect-repellent properties, and lightweight nature. It is a softwood that carves easily and is suitable for intricate designs. Cedar walking sticks have a rustic charm and are favored by those seeking a more natural and fragrant option.
-
Pine: Pine wood is widely available and affordable, making it a popular choice for beginners or those on a budget. While it may not have the same level of durability as hardwoods, pine walking sticks can still be carved with relative ease. They offer a lighter weight option and can be stained or painted to enhance their appearance.
Factors to consider when selecting a walking stick for carving:
-
Wood density: Consider the density of the wood as it can impact the carving process and the overall weight of the walking stick. Some carvers prefer denser woods for intricate carvings, while others may opt for lighter woods for ease of use.
-
Grain patterns: The grain patterns in the wood can add character and visual interest to the carved walking stick. Determine whether you prefer a straight grain, swirls, or more pronounced patterns, and select a wood species accordingly.
-
Moisture resistance: If you plan to use your walking stick outdoors or in damp conditions, consider the wood's natural resistance to moisture. Some woods, like cedar or teak, are more resistant to rotting and can better withstand exposure to moisture.
-
Sustainability: It is important to consider the sustainability of the wood you choose for carving. Opt for responsibly sourced wood or look for alternative materials if sustainability is a concern for you.
Choosing the right wood for carving your walking stick is crucial to achieving a beautiful, durable, and functional end result. Whether you prefer the strength and elegance of hardwoods like oak and walnut or the rustic charm of softwoods like cedar and pine, each wood variety offers unique characteristics that can enhance your carving experience. Consider the wood's hardness, grain patterns, moisture resistance, and sustainability when making your selection. With careful consideration and proper carving techniques, you can create a walking stick that is not only a functional accessory but also a stunning piece of art.
Essential tools and materials
Walking stick carving is a rewarding and creative endeavor that allows individuals to transform a simple piece of wood into a functional and visually appealing work of art. To embark on this carving journey, it is important to have the right tools and materials at your disposal. In this article, we provide a comprehensive guide to the essential tools, recommended wood types, and safety equipment needed for walking stick carving, enabling you to approach your carving projects with confidence and precision.
Carving tools:
-
Carving knives: Carving knives are the backbone of any carving project. Invest in a set of high-quality carving knives with various blade shapes, including straight gouges, V-gouges, and detail knives. These knives will allow you to create intricate designs, remove wood efficiently, and achieve smooth finishes.
-
Carving gouges: Gouges are essential for creating concave shapes, adding depth, and refining contours in your walking stick carvings. Consider having a range of gouge sizes, from shallow to deep, to accommodate different carving techniques and designs.
-
Chisels: Chisels are versatile tools used for shaping and refining the wood surface. They are especially useful for creating flat planes, chamfers, and clean edges. Have a selection of different chisel sizes and bevel angles to suit your carving needs.
-
Mallet: A carving mallet is used in conjunction with chisels and gouges to apply controlled force. It allows for more precise and controlled carving, particularly when working with harder woods. Choose a mallet that is comfortable to hold and provides the necessary weight and balance.
-
Rifflers and rasps: Rifflers and rasps are indispensable tools for shaping, smoothing, and refining the intricate details of your carving. They come in various shapes and grits, allowing you to achieve precise contours and remove wood efficiently.
Recommended wood types for walking stick carving:
-
Basswood: Basswood is a popular choice for beginners and experienced carvers alike due to its softness and ease of carving. It has a light color, minimal grain, and is readily available, making it an ideal wood for intricate and detailed designs.
-
Butternut: Butternut wood is known for its rich, warm tones and straight grain. It is relatively soft and carves well, making it suitable for both beginner and experienced carvers. Butternut walking sticks have a natural beauty and offer a good balance between workability and durability.
-
Birch: Birch wood is known for its strength, fine grain, and light color. It carves smoothly and allows for intricate detailing. Birch walking sticks are sturdy and can withstand regular use.
Preparing the walking stick
Before diving into the intricate art of carving a walking stick, proper preparation is crucial to ensure a smooth and successful carving process. This article provides a comprehensive guide to evaluating the walking stick's shape and form for carving potential, removing the bark, and preparing the surface for carving. By following these steps, you will lay the foundation for a stunning and personalized walking stick creation.
Evaluating the walking stick's shape and form:
-
Choose a suitable walking stick: Select a walking stick that is straight, sturdy, and free from major cracks or defects. Look for a stick that is comfortable to hold and matches your desired length and thickness preferences.
-
Assess the natural features: Evaluate the walking stick for any unique natural features, such as interesting twists, knots, or grain patterns that could enhance the overall design. These natural elements can add character and individuality to your carved walking stick.
-
Consider the ergonomics: Examine the walking stick's shape and curvature to ensure it fits comfortably in the hand. Look for areas where you may want to create a grip or handle that provides optimal support and stability.
Removing bark from the walking stick:
-
Tools for bark removal: To remove the bark, you will need a few essential tools, including a drawknife, a bark spud, and a mallet. These tools will help you efficiently and effectively strip away the outer layer of bark.
-
Stripping the bark: Start by using the drawknife or bark spud to score along the length of the walking stick, following the natural contours. Apply gentle pressure with the mallet if needed to help loosen the bark. Gradually work your way around the stick, peeling off the bark in sections until the entire surface is exposed.
-
Smoothing the surface: After removing the bark, use a sharp knife or a scraper to smooth out any rough patches or remnants of the inner bark. Take care to maintain the natural shape and contours of the walking stick while creating a clean and even surface.
Surface preparation for carving:
-
Sanding the walking stick: To prepare the surface for carving, start by sanding the entire stick. Begin with a coarse-grit sandpaper (around 80 or 120 grit) to remove any remaining roughness or imperfections. Gradually progress to finer grits (such as 220 or 320) for a smoother finish.
-
Removing splinters and knots: Inspect the walking stick for any splinters, sharp edges, or knots that may interfere with the carving process or pose a safety hazard. Use sandpaper, a small file, or a sharp knife to carefully smooth or remove these imperfections.
-
Sealing the wood: Consider applying a wood sealer or preservative to protect the walking stick from moisture and to enhance its longevity. Choose a product suitable for outdoor use and follow the manufacturer's instructions for application.
Proper preparation of the walking stick sets the stage for a successful and enjoyable carving experience. By evaluating the shape and form, removing the bark, and preparing the surface for carving, you ensure that your walking stick is ready to transform into a unique and personalized masterpiece. Take the time to appreciate the natural features of the wood, and remember to work with safety precautions in mind. With a well-prepared walking stick, you are ready to unleash your creativity and bring your carving vision to life.
Designing your carving
Designing a carving is a fascinating and rewarding process that allows you to bring your artistic vision to life. Whether you're a woodcarver, stone sculptor, or any other type of carver, the design stage is crucial in creating a masterpiece that reflects your unique style and craftsmanship. In this comprehensive guide, we will explore the key steps and techniques involved in designing your carving, helping you unleash your creativity and achieve precision in your work.
Sketching and planning your carving design
The first step in designing your carving is to sketch out your ideas on paper. Grab a pencil and let your imagination flow. Think about the overall composition, the subject matter, and the intricate details that will make your carving stand out. Consider the dimensions, proportions, and any specific requirements for the material you'll be working with.
During this stage, it's essential to keep an open mind and explore different possibilities. Experiment with various shapes, lines, and textures to find the perfect balance for your design. Allow yourself to make multiple sketches, refining your concept until you're satisfied with the overall composition.
Once you have a clear vision of your design, it's time to plan the execution. Break down the carving into manageable sections, considering the order in which you'll tackle each part. This planning stage will ensure a smooth and efficient carving process, allowing you to focus on bringing your design to life.
Exploring different patterns, motifs, and themes
Carvings offer a vast playground for exploring patterns, motifs, and themes. Whether you prefer traditional or contemporary styles, there are countless options to choose from. Consider the subject matter of your carving and research different patterns and motifs that relate to your chosen theme.
If you're carving a wildlife scene, for example, study the textures and forms found in nature. Look for inspiration in photographs, books, or even by observing the real-life subjects you aim to capture. Take note of the intricate details and unique characteristics that define each element.
Don't be afraid to infuse your own personal style and interpretation into the design. Add subtle touches that reflect your artistic voice, making the carving truly yours. Remember, your design should evoke emotion and captivate viewers, so take the time to explore various themes and experiment with different ways to convey your message through the carving.
Incorporating personal touches and customization
One of the most exciting aspects of designing a carving is the ability to incorporate personal touches and customization. This is where your creativity can truly shine. Consider adding elements that hold significance to you or the intended recipient of the carving.
For instance, if you're creating a personalized gift, think about incorporating the recipient's hobbies, interests, or favorite symbols into the design. This thoughtful customization adds an extra layer of meaning to the carving and enhances its value.
Experiment with different techniques to create unique textures and finishes. Consider using wood stains, paints, or even inlays to add color and depth to your carving. These additional elements can help elevate your design and make it even more visually striking.
Designing your carving is a process that requires a delicate balance of creativity, planning, and technical skill. By sketching and planning your design, exploring different patterns and themes, and incorporating personal touches, you can create a carving that stands out from the rest.
Remember, the design stage is where your artistic vision takes shape, so don't rush the process. Take your time to explore different possibilities, refine your ideas, and infuse your personal style into the design. With practice and dedication, you'll be able to unleash your creativity and achieve precision in your carvings.
Basic carving techniques
Carving is a timeless art form that allows individuals to transform raw materials into exquisite works of craftsmanship. Whether you're a beginner just starting your carving journey or an experienced artist looking to refine your skills, mastering the fundamental carving techniques is essential. In this guide, we will delve into the world of basic carving techniques, equipping you with the knowledge and skills to create textures, patterns, reliefs, and add depth and dimension to your carvings.
Essential carving techniques for beginners
As a beginner, it's important to start with the basics and gradually build your skill set. Here are a few essential carving techniques to help you get started:
-
Chip carving: Chip carving involves removing small chips of material from a flat surface to create intricate designs. It requires precise knife work and attention to detail. Begin by practicing straight lines, curves, and geometric shapes before progressing to more complex patterns.
-
Whittling: Whittling is the art of carving shapes by removing thin shavings of wood with a knife. It's a versatile technique that allows for the creation of figurines, animals, and other objects. Start with softwoods like basswood or pine, as they are easier to carve, and gradually move on to harder woods as you gain confidence.
-
Relief carving: Relief carving involves carving designs that stand out from a flat background. It adds depth and three-dimensionality to your work. Begin by sketching your design onto the wood, then use carving tools to gradually remove material, leaving the design raised above the surface.
-
Incised carving: Incised carving involves cutting into the wood to create recessed designs. It is commonly used for lettering or creating fine details. Use a V-gouge or chisel to make controlled cuts along the outlines of your design, creating depth and contrast.
Creating textures, patterns, and reliefs
Textures, patterns, and reliefs are essential elements that bring life and visual interest to your carvings. Here are some techniques to help you incorporate these elements into your work:
-
Texturing: Texturing involves adding various surface treatments to your carving to create visual and tactile interest. This can be achieved using tools like gouges, chisels, or even sandpaper. Experiment with different techniques, such as stippling, crosshatching, or gouging, to create unique textures that enhance the overall aesthetic of your carving.
-
Patterns: Patterns are a powerful tool in carving, allowing you to create intricate designs and repetitive motifs. Research traditional patterns or create your own to add a personal touch to your carvings. Transfer the pattern onto your workpiece and carefully carve along the lines, paying attention to detail and maintaining consistency.
-
Reliefs: Reliefs add depth and dimension to your carvings, creating a sense of realism and visual impact. Start by sketching your design onto the wood, then use carving tools to carefully remove material, gradually bringing certain elements forward while leaving others in the background. Pay attention to the interplay of light and shadow, as this will enhance the overall effect of the relief.
Advanced carving techniques
Once you have mastered the basic carving techniques, you may find yourself yearning to push the boundaries of your craftsmanship further. Advanced carving techniques offer the opportunity to create intricate and detailed carvings that showcase your skill and creativity. In this guide, we will explore techniques for achieving more advanced carvings, including incorporating elements such as inlays and filigree, as well as creating realistic representations and figurative carvings.
Incorporating advanced elements: inlays and filigree
Inlays and filigree are advanced techniques that add a touch of elegance and complexity to your carvings. Here's how you can incorporate these elements into your work:
-
Inlays: Inlays involve embedding contrasting materials, such as metals, stones, or other types of wood, into your carving. This technique adds visual interest and can create stunning effects. Begin by selecting a material that complements your design. Carefully carve out a recessed area in your workpiece to accommodate the inlay. Cut the inlay material to fit the recessed area and secure it in place using adhesive or small nails. Finish by sanding and polishing the surface to create a smooth and seamless appearance.
-
Filigree: Filigree is the delicate art of creating intricate, lacy designs by bending and intertwining thin wires. This technique requires patience and precision. Start by sketching your filigree design on paper, paying attention to the details and patterns. Select a suitable wire material, such as silver or brass. Using small pliers and tweezers, carefully shape the wire into the desired pattern and attach it to your carving. Filigree can be used to accentuate specific areas or create decorative borders, adding a touch of sophistication to your work.
Creating realistic representations and figurative carvings
Achieving realistic representations and figurative carvings requires a deep understanding of anatomy, proportion, and attention to detail. Here are some techniques to help you bring your carvings to life:
-
Observation and reference: When aiming for realism, careful observation and reference materials are essential. Study the subject you intend to carve, whether it's a human figure, an animal, or an object. Pay attention to the proportions, details, and subtle nuances that make it unique. Utilize photographs, drawings, or even live models to guide your carving process.
-
Incremental material removal: Realistic carvings require patience and precision. Gradually remove material in small increments, working from general forms to finer details. Take your time to capture the essence of the subject, refining and shaping as you progress. Use a combination of carving tools, such as gouges and knives, to achieve the desired level of detail.
-
Surface texture and finishing: Pay attention to surface texture to enhance the realism of your carvings. Use various tools and techniques to create the appropriate texture for different materials, whether it's smooth skin, textured fur, or rough wood grain. Employ sandpaper, brushes, and other finishing techniques to refine the surface and achieve a polished appearance.
-
Expression and gesture: When carving figurative subjects, capturing expression and gesture is crucial. Focus on the subtle nuances that convey emotion and movement. Pay attention to the position of limbs, facial features, and body language. Use carving tools to sculpt these elements with precision, ensuring that they accurately reflect the intended expression or movement.
By incorporating advanced elements like inlays and filigree and mastering the techniques needed for realistic representations and figurative carvings, you can elevate your craftsmanship to new heights.
Finishing and polishing
After investing time and effort into creating a stunning carving, it's essential to finish and polish the piece to bring out its true beauty. Finishing techniques not only enhance the visual appeal of your work but also provide protection and longevity. In this guide, we will explore the key steps involved in sanding and smoothing carved surfaces, applying finishes and protective coatings, and enhancing the natural beauty of the wood.
Sanding and smoothing carved surfaces
Sanding is a crucial step in the finishing process, as it helps to achieve a smooth and refined surface. Here's how to effectively sand and smooth your carved surfaces:
-
Start with coarse grit: Begin by using a coarse-grit sandpaper, such as 80 or 100 grit, to remove any tool marks, rough surfaces, or imperfections. Sand in the direction of the wood grain, applying even pressure. Be cautious around delicate or intricate areas to avoid over-sanding.
-
Progress to fine grit: Gradually progress to finer grits, such as 150, 220, and even higher, to achieve a smoother finish. Each subsequent grit will help eliminate the scratches left by the previous one. Continue sanding in the direction of the wood grain until you achieve a uniformly smooth surface.
-
Hand sanding: For intricate carvings or hard-to-reach areas, use folded sandpaper or sanding sponges to hand sand. This allows for better control and precision. Be patient and thorough, ensuring that all surfaces are properly smoothed.
-
Final touches: After sanding with the finest grit, inspect your carving for any remaining imperfections. If necessary, lightly sand those areas to achieve a flawless finish. Remember to remove all dust and debris before proceeding to the next step.
Applying finishes and protective coatings
Applying finishes and protective coatings not only adds visual appeal but also safeguards your carving from environmental factors. Here's how to apply finishes effectively:
-
Choose the right finish: Consider the type of wood, the desired appearance, and the level of protection required when selecting a finish. Common finishes include oils, varnishes, lacquers, and waxes. Each has its own unique characteristics and application methods. Research and test different finishes on scrap wood to determine the best choice for your carving.
-
Prepare the surface: Ensure that the surface is clean, dry, and free from any sanding residue. Use a soft brush or cloth to remove any remaining dust. If desired, apply a pre-stain conditioner to help achieve an even finish, especially if working with woods prone to blotching.
-
Apply the finish: Follow the manufacturer's instructions for applying the chosen finish. Use a brush, cloth, or spray gun, depending on the product and your preference. Apply thin and even coats, working with the grain of the wood. Allow each coat to dry completely before applying subsequent coats.
-
Finishing techniques: Depending on the desired effect, you can employ various finishing techniques. For example, glazing involves applying a thin layer of colored finish to enhance the wood's natural grain. Distressing techniques create an aged or weathered look. Experiment with different techniques to achieve the desired aesthetic for your carving.
Adding decorative elements
A walking stick not only serves as a functional accessory but can also be transformed into a unique and visually captivating work of art. By incorporating additional embellishments and decorative elements, you can infuse your walking stick with personality and style. In this guide, we will explore the art of enhancing walking sticks with materials like leather, metal, and gemstones, and delve into various decorative techniques and styles to create a truly remarkable and personalized piece.
Enhancing your walking stick with additional embellishments
Adding additional embellishments to your walking stick can create a striking visual impact and reflect your individuality. Here are a few ideas to consider:
-
Leather wrapping: Leather wrapping not only adds a touch of elegance but also improves grip and comfort. Choose high-quality leather in a color that complements your walking stick. Begin by measuring and cutting a strip of leather that is wide enough to cover the desired area. Apply adhesive to the backside of the leather strip and carefully wrap it around the handle or shaft of the walking stick, ensuring a smooth and tight fit. Secure the ends with adhesive or small decorative studs for a polished finish.
-
Metal accents: Metal accents can lend a touch of sophistication and visual interest to your walking stick. Consider adding metal bands, ferrules, or decorative caps to the top and bottom sections of the stick. Choose metals such as brass, silver, or stainless steel to complement the overall design. These metal accents can be secured using adhesive, screws, or even by embedding them directly into the wood, depending on the desired effect.
-
Gemstone inlays: Gemstone inlays can add a touch of luxury and create a focal point on your walking stick. Select gemstones that resonate with your personal style and the overall aesthetic of the stick. Carefully carve out a recessed area on the handle or shaft of the stick to accommodate the gemstone. Use jewelry adhesive or epoxy to secure the gemstone in place. Ensure that the gemstone sits flush with the surrounding surface and polish it to a smooth finish.
Exploring different decorative techniques and styles
There are countless decorative techniques and styles you can explore to elevate your walking stick's visual appeal. Here are a few to consider:
-
Carving and filigree: Carving intricate designs or filigree patterns into the wood can add a touch of artistry to your walking stick. Experiment with different carving tools to create depth, texture, and visual interest. Consider incorporating nature-inspired motifs, geometric patterns, or personalized symbols that hold significance to you.
-
Pyrography: Pyrography, or wood burning, is a technique that involves creating designs by burning the wood's surface with a heated tool. This technique allows for intricate detailing and can be used to add texture, patterns, or even personalized messages to your walking stick. Practice on scrap wood before working on the actual stick to ensure precision and mastery.
-
Painting and inlaying: Explore the world of painting and inlaying to add vibrant colors and decorative elements to your walking stick. Acrylic paints or wood stains can be used to add intricate designs or highlight specific areas. Inlaying techniques involve embedding contrasting materials, such as different types of wood or resin, into carved recesses to create visually striking patterns or imagery.
-
Handle design: The handle of your walking stick provides a prime opportunity for customization. Experiment with different handle designs, such as animal or mythical creature shapes, abstract forms, or ergonomic grips. Use carving tools, sanding, and finishing techniques to create a comfortable and visually appealing handle that reflects your personal taste.
Display and presentation
Once you have crafted a stunning carved walking stick, it's time to showcase your masterpiece with pride. Proper display and presentation not only highlight the beauty of your creation but also allow others to appreciate your craftsmanship. In this guide, we will explore various methods of displaying and showcasing your carved walking stick, including mounting options, creative display ideas, and ways to share your work with others while seeking valuable feedback.
Displaying your carved walking stick
Choosing the right display method is essential to ensure that your walking stick receives the attention it deserves. Consider the following options:
-
Wall mounting: Wall mounting is an elegant and space-saving option that allows your walking stick to become a focal point in your home or office. Install a decorative wall mount or a custom-designed hanger to securely hold your walking stick. Ensure that the mount or hanger complements the style and aesthetic of both the stick and the room.
-
Display stand: A display stand provides a versatile and portable solution for showcasing your walking stick. Choose a stand made of wood, metal, or acrylic that offers stability and complements the overall design of your stick. Adjustable stands allow you to display your walking stick at different heights and angles, enabling viewers to appreciate it from all perspectives.
-
Glass case: If you want to protect your carved walking stick from dust and physical damage while still showcasing it, consider a glass display case. Select a case with suitable dimensions and adjustable shelves to accommodate the length and height of your walking stick. Place it in a well-lit area to draw attention to the intricate details of your work.
Creative display ideas
While traditional display methods are effective, exploring creative display ideas can add an extra touch of uniqueness to your presentation. Here are a few suggestions:
-
Themed display: Create a themed display to enhance the visual impact of your carved walking stick. For example, if your stick features a wildlife motif, consider placing it alongside related objects like nature photography, animal figurines, or botanical elements. This contextual display helps tell a story and adds depth to the overall presentation.
-
Shadow box display: Shadow boxes offer a creative and artistic way to showcase your walking stick. Choose a shadow box with a deep frame and line the background with fabric, textured paper, or a printed image that complements the stick's design. Secure the walking stick in place using discreet hooks or stands. Consider adding additional items, such as photographs or small mementos, to create a visually compelling arrangement.
-
Interactive display: If your walking stick features movable parts, such as a concealed compartment or hidden mechanism, consider incorporating an interactive display. Design a display stand that allows viewers to engage with the stick, revealing its hidden features or demonstrating its functionality. This interactive element adds intrigue and invites viewers to explore the intricacies of your carving.

Carving for functionality
Carving a walking stick not only allows for creative expression but also presents an opportunity to incorporate functional elements into your design. By adding practical features and ergonomic enhancements, you can create a walking stick that not only looks visually appealing but also serves as a useful tool. In this guide, we will explore how to incorporate functionality into your walking stick, including adding ergonomic handles and grip enhancements, designing practical features such as hidden compartments or tools, and striking the perfect balance between artistry and utility.
Ergonomic handles and grip enhancements
One of the key considerations for a functional walking stick is the comfort and grip it provides. Here are some ideas for incorporating ergonomic handles and grip enhancements:
-
Contoured handles: Designing a contoured handle that conforms to the shape of the hand can significantly improve comfort and grip. Consider carving a handle with ergonomic curves that fit naturally into the palm, reducing strain during extended use. Experiment with different handle shapes and sizes to find the most comfortable option for you.
-
Cushioned grips: Adding a cushioned grip can enhance both comfort and control. Explore materials such as leather, rubber, or foam that can be wrapped around the handle to provide a soft and non-slip surface. Ensure that the grip is securely attached and doesn't interfere with the overall aesthetics of the walking stick.
-
Textured surfaces: Carving textured surfaces on the handle or shaft can improve grip and prevent slipping. Create grooves, ridges, or patterns that add tactile feedback and enhance the overall feel of the walking stick. Be mindful of the depth and spacing of the textures to maintain a comfortable grip without compromising the visual appeal.
Practical features: hidden compartments and tools
Incorporating practical features into your walking stick can add versatility and convenience. Here are some practical ideas to consider:
-
Hidden compartments: Designing hidden compartments within the walking stick can provide a discreet storage solution. Carve a section of the shaft or handle to house small essentials such as a mini compass, a magnifying lens, or a compartment for storing emergency supplies. Ensure that the hidden compartment is securely fastened and can be easily accessed when needed.
-
Multifunctional tools: Carve or attach multifunctional tools to the walking stick to serve a variety of purposes. These tools can include a built-in whistle, a bottle opener, a walking stick tip with a built-in compass, or a detachable spike for added stability on different terrains. The incorporation of such tools adds practicality and increases the utility of the walking stick.
-
Lighting features: For those who enjoy evening walks or hikes, consider integrating a lighting feature into your walking stick. This can be achieved by carving a space for a small LED light or attaching a removable flashlight to the stick. This feature ensures better visibility in low-light conditions and enhances safety during nighttime adventures.
Specialized carving styles and traditions
Carving a walking stick can be an opportunity to delve into regional and cultural carving traditions, adding a layer of meaning and significance to your creation. Exploring specialized carving styles and incorporating traditional symbols and motifs can result in a walking stick that reflects the rich heritage of a particular culture or pays homage to a specific carving tradition. In this guide, we will embark on a journey through diverse regional and cultural carving traditions, explore traditional symbols and motifs, and learn how to adapt these styles to create unique and culturally significant walking sticks.
Regional and cultural carving traditions
Carving traditions vary across different regions and cultures, each with its own unique characteristics and aesthetics. Here are a few notable carving styles to explore:
-
Scandinavian Viking carving: Inspired by the legendary Viking culture, Scandinavian carving is characterized by intricate knotwork, interlacing patterns, and stylized animal motifs. Incorporating these elements into your walking stick can evoke a sense of strength, adventure, and connection to ancient Norse traditions.
-
Native American carving: Native American carving traditions encompass a wide range of styles, with each tribe having its distinct artistic language. Traditional symbols such as feathers, animals, and spiritual motifs can be carved into your walking stick, symbolizing connection to nature, spirituality, and ancestral wisdom.
-
Maori Whakairo carving: Hailing from the indigenous Maori culture of New Zealand, Whakairo carving features intricate patterns and spirals known as "koru." These designs symbolize growth, renewal, and the interconnectedness of life. Incorporating Maori carving elements into your walking stick can celebrate the beauty of nature and the Maori cultural heritage.
Traditional symbols and motifs in walking stick carving
Carving traditional symbols and motifs into your walking stick allows you to imbue it with cultural significance and tell a unique story. Here are a few common symbols and motifs found in walking stick carving:
-
Animal symbolism: Animals hold deep symbolism in many cultures. For example, the eagle symbolizes strength and freedom, the wolf represents loyalty and intuition, and the bear signifies courage and protection. Carving these animal motifs onto your walking stick can evoke these qualities and create a connection to nature.
-
Spiritual symbols: Spiritual symbols, such as the lotus flower representing enlightenment, the Celtic triskelion symbolizing balance and harmony, or the yin-yang symbol denoting the unity of opposites, can be intricately carved onto your walking stick. These symbols can inspire personal reflection, spiritual growth, and a sense of inner peace.
-
Geometric patterns: Geometric patterns, such as the Greek key design, Islamic arabesques, or Celtic knots, have been used in carving for centuries. These patterns can add visual interest and intricate detailing to your walking stick while representing concepts like infinity, unity, or the interconnectedness of all things.
Carving for special occasions
Carving a walking stick for a special occasion can be a heartfelt and memorable way to celebrate and honor significant events or individuals. Whether it's a birthday, anniversary, retirement, or any other milestone, creating a commemorative or personalized walking stick allows you to express your sentiments and create a lasting keepsake. In this guide, we will explore the art of carving walking sticks for special occasions, including creating commemorative pieces, personalizing designs, and customizing walking sticks to fit specific events or themes.
Creating commemorative walking sticks
Commemorative walking sticks serve as timeless reminders of special moments or achievements. Here are a few ideas for creating commemorative walking sticks:
-
Engravings and inscriptions: Carve the name, date, or a meaningful quote onto the walking stick to mark the occasion. This personal touch adds a touch of sentimentality and ensures that the recipient will always remember the event.
-
Symbolic carvings: Incorporate symbolic carvings that represent the significance of the occasion. For example, carving a heart for a wedding anniversary, a diploma for a graduation, or a milestone number for a birthday can create a visual representation of the event.
-
Incorporating mementos: Attach small mementos or objects that hold sentimental value to the walking stick. This could be a charm, a photograph, or a small token that represents a shared memory or the theme of the occasion.
Personalizing walking stick designs
Personalizing the design of a walking stick adds a touch of uniqueness and reflects the personality and preferences of the recipient. Here are a few ways to personalize walking sticks:
-
Favorite hobbies or interests: Incorporate carvings or decorative elements that reflect the recipient's hobbies or interests. For example, if they enjoy fishing, carve a fish or incorporate fishing-related motifs. This personalization adds a meaningful connection to the recipient's passions.
-
Preferred colors and materials: Consider the recipient's favorite colors and materials when designing the walking stick. You can use different types of wood, stains, or even incorporate other materials like leather, gemstones, or metal accents to create a personalized and visually striking design.
-
Customized handle shapes: Carve the handle in a shape that reflects the recipient's preferences. This could be their favorite animal, a symbol that represents their profession, or a design that holds special meaning to them. Customizing the handle shape adds a personal touch and enhances the overall uniqueness of the walking stick.
Customizing walking sticks for specific events or themes
Customizing walking sticks to fit specific events or themes adds an extra layer of fun and creativity. Here are a few ideas for customizing walking sticks:
-
Seasonal themes: Customize the walking stick to match a specific season or holiday. For example, for a winter-themed walking stick, you can carve snowflakes and incorporate blue and silver colors. For a Halloween-themed walking stick, carve pumpkins or bats and use orange and black accents.
-
Cultural celebrations: Customize the walking stick to align with cultural celebrations or traditions. Incorporate symbols, colors, or motifs that are significant to the culture or event being celebrated. For instance, for a Chinese New Year-themed walking stick, carve a dragon and use red and gold colors.
-
Sports or team themes: Show support for a favorite sports team or athlete by customizing the walking stick with their colors, logos, or symbols. Carve sports-related motifs or incorporate sports equipment as decorative elements. This customization allows the recipient to proudly display their team spirit.
Preservation and maintenance
Taking proper care of your carved walking stick is essential to ensure its longevity and preserve its beauty for years to come. By following a few simple preservation and maintenance techniques, you can prevent damage, protect the integrity of the carving, and even restore older or damaged walking sticks. In this guide, we will explore the importance of proper care and maintenance, tips for preventing damage, and restoration techniques for older or damaged walking sticks.
Proper care and maintenance
-
Cleaning: Regularly clean your walking stick to remove dust, dirt, and any other debris that may accumulate on its surface. Use a soft, lint-free cloth or a brush to gently wipe away the dirt. Avoid using harsh chemicals or abrasive cleaners that may damage the wood or finishes.
-
Storage: When not in use, store your walking stick in a cool, dry place away from direct sunlight, excessive humidity, or extreme temperature changes. Proper storage helps prevent warping, cracking, or other damage to the wood.
-
Avoid moisture exposure: Protect your walking stick from prolonged exposure to moisture, as it can cause the wood to swell, warp, or develop mold. If your walking stick gets wet, gently dry it with a soft cloth and allow it to air dry completely before storing it.
Preventing damage
-
Handle with care: Treat your walking stick with care and avoid subjecting it to excessive force or impact. Be mindful of using it on rough surfaces or using it to bear heavy weight, as this can lead to cracks or breakage.
-
Avoid extreme temperatures: Avoid exposing your walking stick to extreme temperatures, as this can cause the wood to expand or contract, leading to warping or splitting. Keep it away from direct heat sources, such as radiators or fireplaces.
-
Protective coatings: Consider applying a protective coating or finish to your walking stick to provide an extra layer of protection. Be sure to choose a finish that is compatible with the type of wood and carving on your stick. Consult with a professional or research suitable finishes for wood preservation.
Restoration techniques
-
Repairing cracks or breaks: If your walking stick has developed cracks or breaks, consider using a high-quality wood glue to carefully reattach the pieces. Apply the glue evenly and use clamps or tape to hold the pieces together until the glue dries completely. Sand the repaired area gently to smoothen any unevenness.
-
Refinishing: If the finish on your walking stick has become worn or damaged, you can refinish it to restore its appearance. Start by sanding the surface gently to remove any old finish and prepare the wood for a new coating. Apply a suitable finish according to the manufacturer's instructions, allowing each coat to dry before applying the next.
-
Consulting professionals: For valuable or antique walking sticks, it is recommended to consult a professional restoration expert who specializes in woodwork. They have the expertise to handle delicate restorations and can ensure that your walking stick retains its original charm and value.
Proper preservation and maintenance of your carved walking stick are crucial for its longevity and aesthetic appeal. By following simple care techniques, preventing damage, and utilizing restoration techniques when necessary, you can enjoy your walking stick for years to come. Remember to treat your walking stick with care and appreciate it as a unique piece of art and craftsmanship.
Connecting with the carving community
Carving can be a deeply rewarding and fulfilling hobby or profession, but it's even more enriching when you connect with a community of like-minded individuals who share your passion for the craft. Engaging with the carving community opens up opportunities for learning, inspiration, and collaboration. In this guide, we will explore the various ways you can connect with the carving community, including joining carving clubs, participating in forums and communities, attending workshops and events, and networking with fellow carvers.
Joining carving clubs
Carving clubs provide a fantastic platform for connecting with fellow carvers, exchanging ideas, and gaining valuable insights from experienced carvers. Consider joining a local carving club in your area or explore online carving communities. Here's how carving clubs can benefit you:
-
Knowledge sharing: Carving clubs often organize regular meetings or gatherings where members can share their techniques, tips, and experiences. This exchange of knowledge helps you expand your skills and learn new carving techniques from seasoned carvers.
-
Support and encouragement: Being a part of a carving club gives you access to a supportive community that understands the challenges and joys of the craft. You can seek advice, get feedback on your work, and find encouragement to keep pursuing your carving goals.
-
Collaborative projects: Carving clubs sometimes organize collaborative projects where members work together on a larger-scale carving. Participating in such projects allows you to learn from others, contribute your skills, and create unique and meaningful pieces as a team.
Participating in carving workshops and events
Attending carving workshops and events is an excellent way to immerse yourself in the carving community and enhance your skills. Here are some benefits of participating in carving workshops and events:
-
Skill development: Workshops offer focused instruction from experienced carvers who can guide you through specific carving techniques or projects. This hands-on learning experience allows you to refine your skills and explore new carving styles.
-
Networking opportunities: Carving workshops and events bring together carvers from different backgrounds and skill levels. It's an ideal opportunity to network, meet fellow enthusiasts, and establish connections with potential mentors, collaborators, or friends who share your passion.
-
Inspiration and exposure: Seeing the work of other talented carvers and witnessing their techniques firsthand can be incredibly inspiring. Workshops and events expose you to a wide range of carving styles, materials, and artistic approaches, sparking new ideas and creative possibilities.
Networking with fellow carvers
Networking with fellow carvers is a valuable way to expand your circle of contacts, learn from others, and share your own experiences. Here are some tips for networking with fellow carvers:
-
Online forums and social media: Participate in carving forums or social media groups dedicated to carving. Engage in discussions, ask questions, and share your work. This virtual networking allows you to connect with carvers from around the world and gain insights from diverse perspectives.
-
Local carving gatherings: Attend local carving gatherings, exhibitions, or demonstrations in your area. Strike up conversations with other attendees and exchange contact information. Building relationships with local carvers creates opportunities for future collaborations or shared experiences.
-
Collaborative projects: Seek out opportunities to collaborate on carving projects with fellow carvers. Collaborations not only allow you to learn from one another but also foster camaraderie and the chance to create unique pieces together.
Showcasing your work
Once you have invested your time, creativity, and skill into carving a walking stick, it's natural to want to showcase your work and share it with others. Showcasing your carved walking sticks not only allows you to celebrate your craftsmanship but also opens up opportunities for recognition, networking, and even potential sales. In this guide, we will explore various ways you can showcase your work, including photographing and documenting your carvings, creating an online portfolio or social media presence, and finding opportunities for exhibiting and selling your work.
Photographing and documenting your carved walking sticks
-
Capture the details: When photographing your carved walking sticks, focus on capturing the intricate details, textures, and unique features of each piece. Use a high-resolution camera or smartphone with good lighting to ensure clarity and accurate representation of your work.
-
Consider different angles: Experiment with different angles and perspectives to showcase different aspects of your carving. Capture shots from the top, sides, and even close-ups to highlight specific details or carving techniques.
-
Document the process: Alongside the final photographs, consider documenting the process of creating your carved walking sticks. This could include progress photos, sketches, or a written description of the inspiration behind each piece. Sharing the process adds depth and storytelling to your work.
Creating an online portfolio or social media presence
-
Build a website: Create a dedicated website or portfolio to showcase your carved walking sticks. Include high-quality images, detailed descriptions, and any relevant background information. A website provides a professional platform for potential buyers, enthusiasts, or galleries to explore your work.
-
Social media platforms: Utilize popular social media platforms like Instagram, Facebook, or Pinterest to create an online presence for your carved walking sticks. Regularly share captivating images, behind-the-scenes glimpses, and engaging stories related to your carving process. Interact with followers and connect with other artists and enthusiasts in the carving community.
-
Engage with the audience: Encourage interaction and engagement by responding to comments, inquiries, or feedback from your online audience. Building a community of supporters and followers not only enhances your visibility but also provides valuable connections and potential opportunities.
Opportunities for exhibiting and selling your work
-
Local art exhibitions: Explore local art galleries, community centers, or craft fairs for opportunities to exhibit your carved walking sticks. Contact organizers and inquire about submission guidelines, exhibition dates, and requirements. Participating in exhibitions allows you to reach a wider audience and gain exposure within the art community.
-
Artisan markets and craft shows: Consider participating in artisan markets or craft shows that cater to handmade and unique creations. These events attract buyers who appreciate craftsmanship and are often on the lookout for distinctive pieces like your carved walking sticks.
-
Online marketplaces: Utilize online marketplaces dedicated to handmade crafts, such as Etsy or Artfire, to showcase and sell your carved walking sticks. Create compelling product listings with detailed descriptions, high-quality images, and competitive pricing. Leverage social media and other online platforms to drive traffic to your online store.
Showcasing your carved walking sticks allows you to share your passion, skills, and artistic vision with a wider audience. By photographing and documenting your work, creating an online presence, and seeking exhibition and selling opportunities, you can reach art enthusiasts, collectors, and potential buyers who appreciate the beauty and craftsmanship of your carved walking sticks.
The therapeutic benefits of carving
Carving is not just a creative and artistic pursuit; it is also a deeply therapeutic and meditative practice that can have a profound impact on one's mental and emotional well-being. The act of carving allows individuals to enter a state of mindfulness, reduce stress, and find solace in the process of creating something beautiful with their own hands. In this article, we will explore the therapeutic benefits of carving, delve into the meditative aspects of the craft, and share personal stories and experiences from carvers who have found solace and healing through their carving practice.
Meditation in motion: the mindfulness of carving
Carving provides a unique opportunity to engage in a form of active meditation. As carvers immerse themselves in the process, their focus shifts entirely to the carving tool and the piece of wood in front of them. Here's how carving promotes mindfulness:
-
Singular focus: When carving, the mind becomes fully absorbed in the present moment, with all attention directed towards the act of shaping the wood. This singular focus allows carvers to let go of worries, anxieties, and distractions, cultivating a sense of inner calm and presence.
-
Flow state: Carving can induce a state of flow, where time seems to stand still, and the carver is fully engrossed in the activity. In this state, the mind becomes deeply focused, and a sense of joy and fulfillment arises from the seamless merging of action and awareness.
-
Tactile sensations: The tactile sensations experienced during carving, such as the feel of the wood, the smoothness of the carving tool, and the sound of the carving process, further enhance the mindfulness experience. These sensory inputs anchor the carver in the present moment, heightening their connection to the creative process.
Stress reduction and emotional well-being
Carving offers a respite from the stresses and pressures of daily life, providing a sanctuary where individuals can find solace and express themselves. Here's how carving can reduce stress and promote emotional well-being:
-
Release of tension: The rhythmic and repetitive motions of carving can have a soothing effect on the body and mind. As carvers engage in the process, they release tension and pent-up emotions, creating a sense of relaxation and relief.
-
Creative expression: Carving serves as a means of self-expression, allowing carvers to channel their thoughts, emotions, and experiences into their creations. This form of artistic expression can be cathartic, providing an outlet for emotional release and a way to process complex feelings.
-
Sense of achievement: Completing a carving project brings a sense of accomplishment and pride. This feeling of achievement boosts self-esteem, instills a sense of purpose, and contributes to overall emotional well-being.
Frequently Asked Questions
Carving walking sticks is an engaging and rewarding craft that allows individuals to express their creativity while creating functional and beautiful pieces. As with any craft, beginners often have questions about the tools, time commitment, and artistic experience required. In this section, we will address some frequently asked questions to provide you with a better understanding of carving walking sticks.
1. What are some recommended beginner-friendly carving tools?
For beginners, it's essential to start with the right tools to ensure a positive carving experience. Here are some recommended tools for beginners:
-
Carving knife: A carving knife is a versatile tool that allows for precise cuts and shaping. Look for a knife with a comfortable handle and a sharp, durable blade.
-
Gouges: Gouges are curved chisels that are ideal for removing larger areas of wood and creating rounded shapes. Start with a few basic gouges of different sizes to practice different carving techniques.
-
V-tool: A V-tool, also known as a veiner, is used to create intricate details and fine lines. It has a V-shaped blade that allows for precise carving and decorative elements.
-
Mallet: A wooden or rubber mallet is used in conjunction with chisels and gouges to apply controlled force for carving deeper into the wood. It helps in removing larger chunks of wood efficiently.
-
Safety equipment: It's crucial to prioritize safety while carving. Wear protective gloves, goggles, and a carving apron to protect yourself from potential accidents.
2. How long does it take to carve a walking stick?
The time required to carve a walking stick depends on various factors, including the complexity of the design, your skill level, and the amount of time you can dedicate to carving. Simple designs with basic carvings may take a few hours or a couple of days to complete, while more intricate designs can take several weeks or even months.
It's important to remember that carving is a process that requires patience and practice. As you gain experience and confidence in your carving skills, you'll likely become more efficient and able to complete projects in a shorter amount of time.
3. Can I carve walking sticks without prior artistic experience?
Absolutely! Carving walking sticks does not necessarily require prior artistic experience. While some background in art or woodworking may be helpful, it is not a prerequisite for starting this craft. Carving walking sticks can be enjoyed by individuals of all skill levels, from beginners to experienced artists.
Starting with simpler designs and gradually progressing to more complex ones allows beginners to develop their skills and gain confidence. There are also many resources available, such as books, online tutorials, and workshops, that provide step-by-step guidance and tips for carving walking sticks.
Remember, carving is a journey of continuous learning and improvement. Embrace the process, be patient with yourself, and enjoy the satisfaction of creating something unique and beautiful with your own hands.
Conclusion
Throughout this article, we have delved into the captivating world of carving walking sticks. We have explored various aspects of this craft, from beginner-friendly techniques to advanced carving styles, and from the therapeutic benefits to the preservation and showcasing of carved walking sticks. Let's recap the key points discussed and reflect on the joys and rewards of exploring creativity through carving.
Carving walking sticks is a craft that offers both artistic expression and functional utility. It allows individuals to transform a simple piece of wood into a unique and personalized walking companion. We began by discussing the essential techniques for beginners, such as creating textures, patterns, and reliefs, and adding depth and dimension to carvings. We then moved on to advanced techniques, including incorporating inlays and filigree, and creating realistic representations and figurative carvings. These techniques enable carvers to push the boundaries of their creativity and craftsmanship.
Furthermore, we explored the finishing and polishing process, which involves sanding, smoothing, and applying protective coatings to enhance the natural beauty of the wood. Adding decorative elements, such as leather, metal, and gemstones, further elevates the visual appeal of walking sticks, making them truly one-of-a-kind. We also discussed the importance of display and presentation, sharing tips on how to showcase carved walking sticks through creative mounting options and online platforms.
Carving walking sticks goes beyond mere aesthetics. We explored the incorporation of functional elements, such as ergonomic handles and hidden compartments, to make walking sticks not only visually appealing but also practical and useful in daily life. We then delved into the rich world of specialized carving styles and traditions, drawing inspiration from regional and cultural influences, and adapting traditional motifs to create unique walking sticks.
Carving walking sticks holds immense potential for special occasions and gifting. We discussed the art of creating commemorative or personalized walking sticks, tailoring them to specific events or themes, and making them heartfelt gifts that hold sentimental value. Moreover, we emphasized the importance of preservation and maintenance to ensure the longevity of carved walking sticks, as well as the significance of connecting with the carving community through clubs, workshops, and events.
We explored the opportunities for showcasing carved walking sticks, including photographing and documenting them for online portfolios and social media. Exhibiting and selling one's work provides a platform to share artistic creations with a broader audience and potentially turn a passion into a profession. Lastly, we dived into the therapeutic benefits of carving, highlighting how it fosters mindfulness, reduces stress, and offers solace and healing. Through personal stories and experiences, we witnessed the transformative power of carving in the lives of individuals.
In conclusion, carving walking sticks is a captivating and rewarding art form that combines creativity, skill, and mindfulness. Whether you are a beginner taking your first steps in carving or an experienced carver seeking to refine your techniques, the art of carving walking sticks offers endless possibilities for exploration and self-expression. Embrace the joy of creating something beautiful with your own hands and discover the profound satisfaction that comes from turning a simple piece of wood into a work of art.
Also Purchased
-
Beige Walking Cane for Ladies Chamomile Flower, Wooden Walking Stick
Introducing our beautiful Beige Walking Cane for Ladies with Chamomile Flower, a Wooden Walking Stick that is hand carved and handmade, making it both pretty and unique. This walking cane...$79.50 -
Black Skull Head Walking Stick, Wedding Ceremony Designer Skull
Looking for a stylish and unique walking stick to elevate your look at your next event? Check out our Black Skull Head Walking Stick, the perfect accessory for any wedding...From $217.00 -
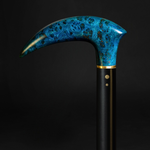
Exotic Burl Wood Walking Cane – Fashionable Artisan Stick
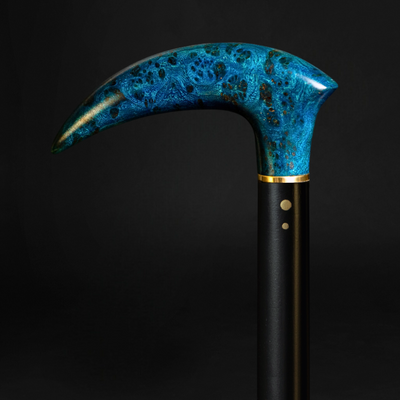
A sculptural statement in deep, oceanic blue — this walking cane is more than a support accessory, it's wearable art. Meticulously hand-shaped from stabilized burl wood, the handle evokes the...$425.00 -
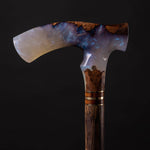
ArtWalkingSticks™ MAGIC Walking Cane, Handmade - Make to Order
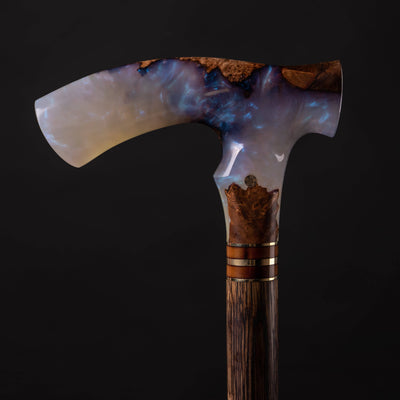
This piece of art is created for those who value details. We make one of a kind, handcrafted wood and resin canes. Our Wooden Canes are completely unmatched in creativity....$430.00 -
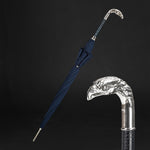
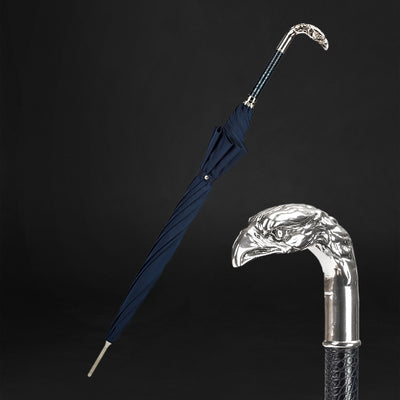
Umbrella with Eagle Handle, Fashion Umbrella For Men
Make a bold and fashionable statement with our Umbrella with Eagle Handle - a unique and functional accessory designed for men. The striking eagle handle is the highlight of this...$325.00 -
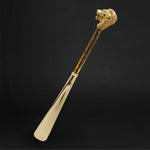
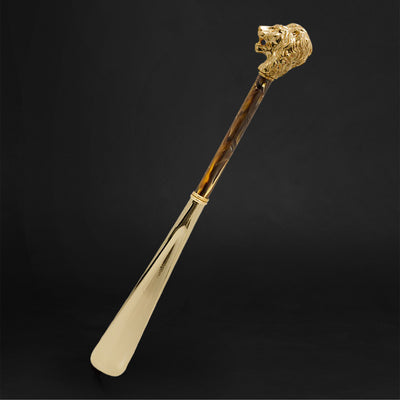
Fashionable Lion Shoehorn Long Handle, Pearly Brown Shaft, Handmade
Introducing our Fashionable Lion Shoehorn, a handcrafted, long-handled shoe horn with a pearly brown shaft that's both stylish and practical. The intricate Lion design adds a touch of elegance to...$240.00


